Buying the right camera is only step one. Once a UAE clinic has a mirrorless or DSLR body, a true macro lens, and a flash system in hand, the next question is the one that actually determines image quality every single day: what settings should the team actually use, and how should the light be set up?
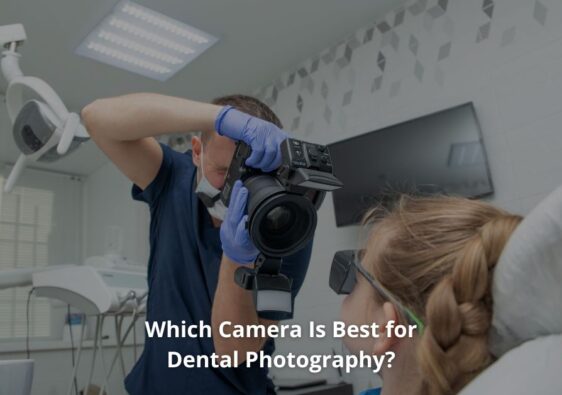
If you haven’t finalized your equipment yet, our guide on the best camera for dental photography in 2026 for UAE clinics covers camera bodies, macro lenses, ring flash vs. twin flash, and full kit recommendations by clinic type. This guide picks up from there and focuses entirely on the part most clinics get wrong after the purchase: consistent, repeatable settings and lighting.
Two clinics can own the exact same Canon EOS R10 with the exact same 100mm macro lens and still produce completely different image quality. The difference is almost never the equipment. It’s the settings, the lighting technique, and whether the whole clinical team follows the same protocol.
Why Settings Consistency Matters More Than Equipment
A dental photo is only useful if it can be compared. Orthodontic progress, periodontal healing, whitening results, and veneer case documentation all depend on before-and-after images that were captured the same way.
If one dentist shoots at f/16 with a warm-toned flash and another shoots at f/32 with a cooler flash, the “before” and “after” images will look different even if nothing clinically changed. This creates three problems:
- Inaccurate visual comparison for treatment tracking
- Inconsistent shade communication with the lab
- Weak case presentation for patient consent and marketing
The fix isn’t a better camera. It’s a written settings protocol that lives near the camera station, so nobody has to guess or rely on memory.
Understanding the Exposure Triangle for Dental Photography
Every dental photography setting decision comes back to three variables: aperture, ISO, and shutter speed. Clinics don’t need a full photography course to use them correctly, but a basic understanding helps staff troubleshoot when an image comes out too dark, too bright, or out of focus.
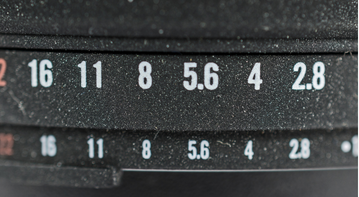
Aperture: The Depth of Field Control
Aperture controls how much of the image stays in sharp focus. In macro photography, depth of field is extremely shallow at wide apertures, which is a problem inside a mouth where the front teeth and back molars sit at different distances from the lens.
- Intraoral shots need a narrow aperture, typically f/22 to f/32, so the entire arch stays in focus from the front incisors to the back molars.
- Extraoral portraits and smile photos can use a wider aperture, typically f/8 to f/16, since the subject sits on a more even plane and a touch of background softness is acceptable.
A common mistake is using the same aperture for both. An intraoral image at f/8 will look sharp in the center and blurry at the edges. A portrait at f/32 will often come out underexposed unless the flash output is increased to compensate.
ISO: Keep It Low and Fixed
ISO controls the sensor’s sensitivity to light. Clinical dental photography relies on flash for its light source, not ambient room light, so ISO should stay low and fixed rather than adjusted per shot.
- Recommended ISO: 100, or 200 at most.
A low, fixed ISO keeps noise out of the image and keeps color rendering consistent across sessions. If images are coming out dark, the fix is almost always flash power or aperture, not raising the ISO.
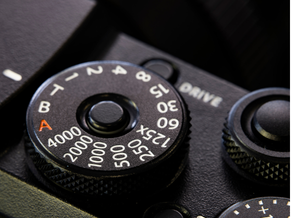
Shutter Speed: Fast Enough to Sync, Not Faster
Shutter speed in dental photography is less about controlling light and more about staying within the camera’s flash sync speed, which is usually 1/125 to 1/200 of a second for most mirrorless and DSLR bodies.
Going faster than the sync speed with a standard flash setup can produce a partial black bar across the image. Going much slower increases the risk of motion blur from patient movement or hand shake, and it lets more ambient light into the frame, which can shift color balance.
- Recommended shutter speed: 1/125 to 1/160, unless the camera manual specifies a different maximum sync speed.
Putting the Triangle Together
| Shot Type | Aperture | ISO | Shutter Speed |
| Intraoral (retracted, occlusal) | f/22 – f/32 | 100 | 1/125 – 1/160 |
| Extraoral portrait | f/8 – f/11 | 100 – 200 | 1/125 |
| Smile / anterior esthetic | f/11 – f/16 | 100 | 1/125 |
These are starting points. The exact numbers depend on your specific flash output, room, and lens, but they give the team a fixed reference point instead of guessing each time.
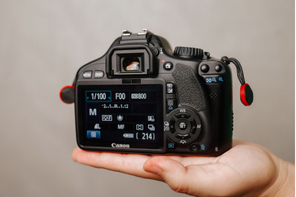
Manual Mode Is Non-Negotiable
Auto and program modes let the camera decide exposure, which defeats the purpose of a controlled clinical setup. The camera should always be operated in Manual mode for dental photography, with the flash also set to manual output rather than automatic TTL metering, once the team has dialed in a working combination.
Manual mode does two things automatic modes can’t:
- It keeps every image shot under the same conditions, which is essential for before-and-after comparison.
- It allows the settings to be written down, saved as a custom mode on the camera dial (many bodies offer C1, C2, or C3 custom slots), and reused without re-adjusting from scratch.
If your camera supports custom mode presets, save one profile for intraoral shots and a second for extraoral portraits. This removes the guesswork for staff who are not photography specialists.
White Balance: Getting Color Right for Shade Matching
Color accuracy is one of the most overlooked parts of dental photography, and it matters clinically, not just aesthetically. Shade communication with a dental lab depends on the photo showing true, neutral tooth color rather than a warm or cool color cast introduced by the wrong white balance.
- Set white balance to the Flash preset if using a compatible flash, or better, set a custom white balance using a grey card under your actual flash setup.
- Avoid Auto White Balance for clinical shade work. It shifts from shot to shot and makes accurate shade comparison unreliable.
- Reset and recheck custom white balance if you change flash units, diffusers, or bulbs.
A five-minute grey card calibration, done once per camera setup and rechecked periodically, prevents months of inconsistent color in the patient record.
Focus: Manual vs. Autofocus for Macro Work
At narrow apertures like f/22, depth of field is deep enough that focus precision matters less than it does in portrait photography, but it still affects sharpness.
- Single-point autofocus works well for most staff, especially newer mirrorless bodies with reliable eye or subject detection adapted for macro use.
- Manual focus gives more control for experienced users, particularly for close intraoral shots where autofocus can hunt in low ambient light.
A practical approach for clinics with mixed staff skill levels: default to single-point autofocus, placed on the central incisors or the area of clinical interest, and only switch experienced photographers to manual focus if autofocus is inconsistent in your specific room lighting.
File Format: JPEG vs. RAW
- JPEG is sufficient for routine clinical documentation, hygiene records, and general case notes. It’s smaller, faster to upload, and easier to standardize across a busy clinic.
- RAW + JPEG is worth the extra storage for cosmetic cases, veneer and smile design documentation, shade communication, and any image likely to be used in patient consultation or marketing. RAW files allow color and exposure correction later without degrading the image.
Set the camera to record RAW + JPEG only for flagged case types, not by default for every patient, to avoid unnecessary storage load and slower upload workflows.
Lighting Setup: The Part That Actually Makes or Breaks the Image
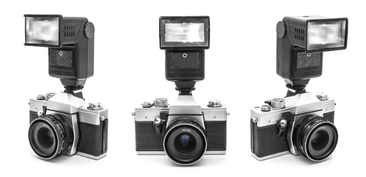
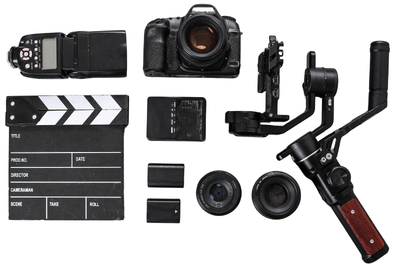
Settings control exposure, but lighting technique controls how the image actually looks. As covered in our camera buying guide, most clinics choose between a ring flash and a twin flash. The setup and positioning of whichever system you use matters just as much as the choice itself.
Ring Flash Setup
A ring flash mounts around the front of the lens and fires light evenly and directly toward the subject. It’s the easiest system for a mixed clinical team to use consistently.
Positioning tips:
- Keep the flash centered and square to the subject. An angled ring flash creates uneven shadowing on one side of the arch.
- Use the diffuser or dome attachment if included. It softens the light and reduces harsh reflections off wet enamel and saliva.
- Set flash power manually and keep it fixed once dialed in for your room. Adjust output only if the room’s ambient light changes significantly (for example, a treatment room with a large window versus an internal room with no windows).
Where ring flash works best: posterior and occlusal intraoral shots, general documentation, hygiene records, orthodontic progress photos, and any workflow where speed and consistency across multiple staff members matters more than dramatic lighting.
Twin Flash Setup
A twin flash uses two separate flash heads mounted on brackets on either side of the lens, angled inward toward the subject. This produces more natural shadow and contour, which matters for anterior esthetic work.
Positioning tips:
- Angle both flash heads slightly toward the center of the subject, not straight forward, so the light wraps around the teeth rather than flattening them.
- Keep the two flash outputs balanced (equal power on both sides) for even, symmetric lighting unless you’re intentionally creating directional shadow for a specific texture effect.
- Use diffusers on both heads for anterior smile shots. Bare twin flash can create harsh double-catchlight reflections on wet tooth surfaces.
- Check that flash-to-lens distance stays consistent between shots. Twin flash brackets can shift slightly with handling, which changes the lighting angle between one patient and the next.
Where twin flash works best: anterior esthetic cases, veneer and smile design documentation, shade communication with labs, and any image intended for patient consultation or case marketing.
Ambient Room Light: Reduce It, Don’t Rely On It
Operatory ceiling lights, window daylight, and dental unit lights all introduce inconsistent color temperature into a photo that’s otherwise lit and calibrated for flash. Where possible:
- Dim or turn off strong overhead room lighting during photo capture.
- Position the patient chair away from direct window light, since UAE clinics often deal with strong, variable daylight depending on the time of day and building orientation.
- Rely on the flash as the dominant light source so every image, regardless of room, time of day, or weather, looks consistent.
Working Distance and Framing Consistency
Lighting quality also depends on how far the camera sits from the patient. Standardize the working distance for each shot type so flash intensity and framing stay consistent:
- Intraoral retracted views: close, filling the frame with the dental arch
- Occlusal views: consistent mirror angle and distance to avoid distortion
- Full face and smile shots: fixed distance from a marked spot on the floor or a set chair position, so framing doesn’t vary between doctors
Some clinics tape a small floor mark or use a fixed camera height on a mini tripod for portrait shots. It sounds minor, but it removes one more variable from the comparison.
Building a One-Page Settings Reference for Your Team
The single highest-impact thing a clinic can do after buying equipment is create a laminated, one-page settings sheet and keep it at the camera station. It should include:
- Camera mode (Manual) and custom preset number if saved
- Aperture, ISO, and shutter speed for each shot type (intraoral, portrait, smile)
- White balance setting
- Flash type and power level for each shot type
- Standard shot sequence (full face, full smile, profiles, retracted views, occlusal views)
- Who to contact if settings need recalibration
New hires, associate dentists, and hygienists should be walked through this sheet during onboarding, not left to figure it out from a previous doctor’s habits.
Common Lighting and Settings Mistakes to Avoid
Relying on auto exposure or auto white balance. These modes react differently every time, which defeats the purpose of clinical documentation.
Using the same aperture for intraoral and portrait shots. One will always look wrong. Save two presets instead.
Skipping the diffuser. A bare flash on wet enamel creates harsh, distracting reflections that make images harder to read clinically.
Letting flash power drift between staff members. If everyone adjusts flash output “by eye” per patient, no two images will match. Fix the output and change only aperture or distance if needed.
Not rechecking white balance after equipment changes. Swapping a diffuser, bulb, or flash unit shifts color temperature. Recalibrate with a grey card after any hardware change.
Ignoring ambient light in the room. A photo taken near a bright window in the afternoon will look different from the same setup used in the morning unless ambient light is controlled.
Where This Fits Into the Bigger Workflow
Correct settings and lighting solve the capture problem, but the image still needs a home. Once your team is producing consistent, well-lit photos, the next step is making sure every image is tied to the correct patient record, visit date, and treatment plan, not left scattered across SD cards and personal phones.
This is the same workflow gap we cover in our dental camera buying guide: a good camera setup captures the image, but a proper clinic management system is what makes that image clinically useful over time. Balsam Medico is built for UAE clinics that need EMR, scheduling, billing, eClaimLink, and NABIDH/Riayati-aligned documentation in one system, so a standardized photo can flow directly into the patient’s file where it belongs.
Learn more about how Balsam Medico supports clinic documentation workflows: balsammedico.com/features
Final Recommendation
Good dental photography settings are not complicated, but they need to be decided once, written down, and followed by everyone on the clinical team. Start with Manual mode, a narrow aperture for intraoral work, a wider aperture for portraits, a low fixed ISO, and a shutter speed that matches your flash sync. Pair that with a properly positioned ring flash or twin flash, a calibrated white balance, and controlled ambient lighting.
The camera body and lens get most of the attention when clinics shop for equipment. In daily practice, it’s the settings sheet taped next to the camera and the lighting habits of your team that actually determine whether your before-and-after photos are useful five years from now.
Connect with Us
Ready to embark on this exciting journey? Contact us today:
📍 Dubai, United Arab Emirates – Tel: +971 56 640 9602
📍 Khartoum, Sudan – Tel: +249 91 273 1048
Explore Balsam Medico and discover a world of efficient clinic management at www.balsammedico.com. Together, let’s reduce fines, elevate efficiency, and embrace a new era of dental healthcare.
One last thing..
PS: We built Balsam Medico to be the best software for clinics in UAE and the middle east. It is powerful, flexible, and most importantly, very easy to use.
If you have two minutes, see how it works.
This is the main landing page to learn more.