If you manage a clinic in Dubai, submitting insurance claims through eClaimLink is not optional – it is the mandated pathway for all DHA-regulated healthcare providers. For many clinic administrators and billing coordinators, however, that first submission can feel like navigating an unfamiliar system under pressure. One missed field, a wrong code, or a skipped document can mean a rejected claim, delayed reimbursement, and a lengthy appeals process.
This guide exists to remove that uncertainty. Whether you have just been onboarded to eClaimLink or you are training a new billing team member, these steps will walk you through the entire submission process – from verifying patient eligibility right through to tracking your claim’s status – in clear, actionable language.
What is eClaimLink and why it matters
eClaimLink is the Dubai Health Authority’s (DHA) official electronic claims submission portal. All licensed healthcare providers in Dubai, from private polyclinics to specialist centres, are required to route their insurance claims through this system. It serves as the central interchange between clinics, insurance payors, and the DHA, ensuring that claims are standardised, traceable, and compliant with the Unified Health Claims Data Set (UHCDS).
For clinic administrators, eClaimLink is both a compliance tool and a business-critical system. A claim submitted correctly through eClaimLink moves swiftly through the adjudication cycle, resulting in faster reimbursement and fewer write-offs. A claim submitted incorrectly risks rejection, penalty, or even regulatory scrutiny.
Understanding the step-by-step flow is therefore not just helpful; it is essential operational knowledge for any Dubai-based clinic.
Before you begin, get ready
A smooth submission starts before you even open the portal. Gather the following items for every claim:
- Valid eClaimLink login credentials for your facility (issued by your DHA-registered administrator)
- Patient’s Emirates ID and health insurance card details
- Insurance payor code and policy number
- Treating clinician’s DHA licence number and speciality code
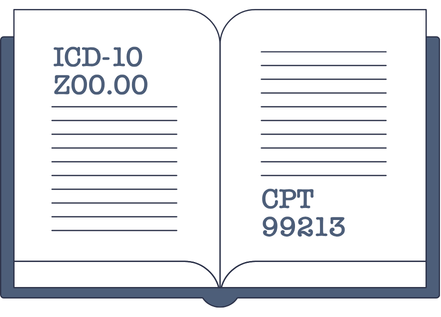
- Correct ICD-10 diagnosis codes relevant to the encounter
- Correct CPT/CDT procedure codes for all services rendered
- Supporting clinical documentation: consultation notes, lab results, radiology reports, referral letters, if applicable
- The date of service and facility code for your clinic
The step-by-step submission process
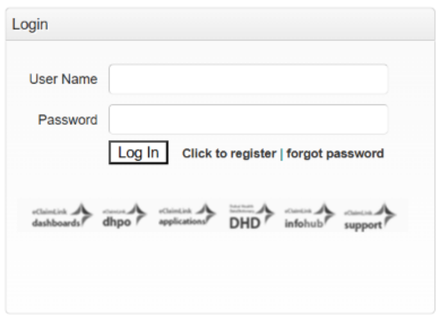
Step 1: Log In to the eClaimLink Portal
Navigate to the official eClaimLink portal at eclaimlink.ae and enter your facility’s registered username and password. If your clinic operates multiple branches, confirm that you are logged in under the correct facility profile before proceeding. Submitting a claim under the wrong facility ID is one of the most common – and easily avoidable – administrative errors.
Once logged in, you will land on the main dashboard, which displays your facility’s pending transactions, recent claim history, and system notifications from the DHA. Take a moment to review any active alerts before beginning a new submission.
Step 2: Verify Patient Eligibility
Before building any claim, always run an eligibility check. This is the single most important pre-submission step and the one most frequently skipped under time pressure. In eClaimLink, navigate to the Eligibility section and enter the patient’s Emirates ID number and insurance member ID.
The system will return real-time eligibility data sourced directly from the insurer, including:
- Confirmation that the policy is active on the date of service
- Network status (whether your facility is in-network for this patient’s plan)
- Co-payment amounts and deductible thresholds
- Any applicable preauthorisation requirements for the planned treatment
- Benefit limits or exclusions relevant to the service you intend to claim
Submitting a claim without verifying eligibility first is the leading cause of outright denials. A patient’s card may have expired, their policy may have lapsed, or the service may fall outside their plan’s covered benefits. Always check before you treat and before you bill.
Step 3: Obtain Preauthorisation (Where Required)
Certain treatments, procedures, and investigations require advance approval from the insurer before the service is provided. eClaimLink includes a preauthorisation (PA) module where you can submit PA requests directly to the relevant payor. High-value diagnostics (such as MRI or CT scans), elective procedures, and specialist referrals commonly require preauthorisation under Dubai insurance protocols.
In the PA module, you will be asked to provide the treating clinician’s details, the proposed procedure codes, the clinical justification, and any supporting medical documentation. Most payors operating through eClaimLink respond to PA requests within 24 to 48 hours, though urgent clinical scenarios can be escalated.
Getting a prior authorisation (PA) approved is not the end of the process — there are still deadlines your clinic needs to meet after that. In Dubai, a PA approval is only valid for a specific treatment, a specific doctor, and specific dates. If a patient’s appointment gets rescheduled and the new date falls outside the approved window — even by just one day — the insurer will reject the claim automatically. So before any patient comes in for a PA-required procedure, always check that their appointment date matches the dates on the approval letter.
Once the treatment is done and everything is documented, the claim needs to be submitted without unnecessary delay — late submissions attract daily penalty fees. For patients who were admitted to the hospital, there is one extra step: the treatment code used in the original PA request may need to be updated to reflect what actually happened during the stay, and this update must be done within 48 hours of the patient being discharged. After the clinic submits the claim, the insurer is required to process it and send payment within 45 days. Staying on top of these timeframes is what keeps claims moving smoothly and ensures your clinic gets paid on time.
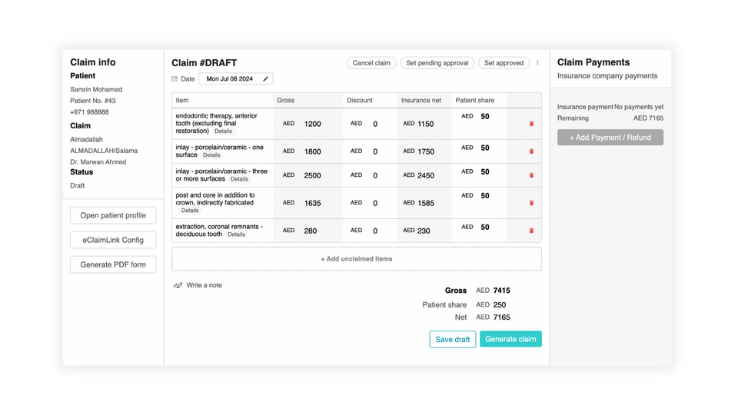
Step 4: Create a New Claim
With eligibility confirmed and any required preauthorisation in hand, you are ready to build the claim. From the eClaimLink dashboard, select ‘New Claim’ and choose the appropriate claim type – in most outpatient dental or medical scenarios, this will be a Professional claim.
For inpatient episodes, select Institutional. You will now complete the claim form across several structured sections:
- Facility & Provider Information
Confirm your facility’s DHA licence number, the treating clinician’s DHA licence number, and the relevant speciality code. These fields are often pre-populated if your clinic profile is correctly configured in the system, but always verify them before proceeding.
- Patient & Insurance Details
Enter the patient’s Emirates ID, insurance member ID, payor code, and policy number. The system will cross-reference these against the eligibility data you retrieved in Step 2. Any mismatch here will trigger a system validation error before the claim is submitted.
- Encounter Details
Record the date of service, the type of encounter (consultation, follow-up, procedure), and any relevant referral information. If the encounter was the result of an insurer-approved referral, attach the referral authorisation number here.
Enter all applicable ICD-10-CM diagnosis codes for the encounter. Under UHCDS guidelines, you must designate one code as the principal diagnosis – the condition primarily responsible for the encounter – and may list additional secondary diagnoses where clinically relevant. Vague or unspecified codes are a frequent cause of claim downcoding or rejection; always use the most specific code the clinical documentation supports.
For each service line, enter the relevant CPT or CDT procedure code, the quantity, the unit charge, and link it to the appropriate ICD-10 diagnosis code. Every service line must be supported by at least one diagnosis code; a service line with no diagnosis linkage will fail system validation.
Step 5: Attach Supporting Documentation
eClaimLink allows – and in many cases requires – you to attach clinical documentation to support the claim. The documents most commonly required by Dubai payors include:
- The treating clinician signed the consultation or treatment notes
- Laboratory results, radiology reports, or pathology findings referenced in the claim
- The preauthorisation approval letter (if applicable)
- Prescription records for medication claims
- Referral letters for specialist visits
Upload documents in the accepted formats (typically PDF or JPEG) and within the system’s file size limits. Label your attachments clearly – a well-organised document set signals professionalism to the payor’s adjudicator and often speeds up the review process.
Step 6: Review, Validate, and Submit
Before hitting submit, run through a final review checklist:
All mandatory fields completed: facility, provider, patient, payor, diagnosis, and procedure sections
Diagnosis codes are specific and clinically accurate
Each service line is linked to at least one diagnosis code
Charges correctly entered – consistent with your facility’s fee schedule and payor contract rates
Supporting documents attached and legible
Preauthorisation number included where required
eClaimLink will run an automated system validation when you select ‘Submit’. If the system flags any errors – missing fields, code mismatches, or failed linkages – it will return a list of specific error codes. Address each error, then resubmit. Do not ignore system warnings in the hope that the claim will pass; unaddressed errors result in automatic rejection at the payor level.

Step 7: Track Claim Status and Manage Responses
Once submitted, the claim enters the adjudication queue with the relevant payor. Use eClaimLink’s claim tracking module to monitor progress. Claims will move through the following statuses:
- Submitted – received by eClaimLink and forwarded to the payor
- In Review – under adjudication by the payor’s clinical or billing team
- Approved – claim accepted; payment will follow per the payor’s payment cycle
- Partially Approved – some service lines approved, others queried or denied
- Denied – claim rejected in full; a denial reason code will be provided
- Pending Additional Information – payor has requested supplementary documentation
For denied or partially approved claims, review the denial reason code carefully. Many denials are administrative in nature and fully reversible through a corrected resubmission or a formal appeal. eClaimLink provides an appeals module where you can attach a written rebuttal and additional clinical evidence to support an overturn.
The Five Most Common Submission Errors (and How to Avoid Them)
After working with clinics across Dubai, the Balsam Medico team has identified five errors that account for the majority of first-time rejection events:
- Skipping the eligibility check. Always verify before the encounter, not after.
- Using non-specific ICD-10 codes. Payors expect specificity. ‘Unspecified’ codes invite downcoding or denial.
- Missing diagnosis-to-procedure linkage. Every service line must be tied to a relevant diagnosis code.
- Submitting without preauthorisation. For procedures that require PA, submission without an approval number will result in automatic denial.
- Incomplete or missing documentation. Adjudicators need sufficient clinical context to approve a claim. Sparse or missing notes are a leading cause of ‘pending additional information’ delays.
How Balsam Medico Simplifies Every Stage of the eClaims Workflow
Balsam Medico is purpose-built for clinics operating under Dubai’s DHA regulatory framework. Our platform integrates directly with eClaimLink, meaning your team never has to manually re-enter data that already exists in the clinical record. Key features include:
- Simplified patient registration of insurance plans and coverage
- Integrated ICD-10 and CPT coding assistance
- Mandatory diagnosis-to-procedure linkage
- Direct eClaimLink submission from within the Balsam Medico interface – no portal switching required
- Claim status tracking and denial management dashboard with payor response timelines
- Direct Remittance Advice dashboard so no payment is forgotten
- Built-in audit trail for DHA compliance reviews
The result is a faster, cleaner claims cycle – fewer rejections, shorter reimbursement windows, and a billing team that spends its time on high-value work rather than chasing avoidable errors.
Conclusion
Submitting your first eClaim through eClaimLink in Dubai does not have to be a source of anxiety. The process is systematic and, once understood, highly repeatable. The clinics that achieve consistently high first-pass acceptance rates are simply the ones that treat each step in this guide – eligibility verification, accurate coding, complete documentation, and thorough pre-submission review – as non-negotiable standards of practice.
With the right processes and the right clinic management software, clean claims can become the rule rather than the exception.
Ready to streamline your eClaimLink workflow? Contact us to experience the new standard.
Connect with Us
Ready to embark on this exciting journey? Contact us today:
📍 Dubai, United Arab Emirates – Tel: +971 56 640 9602
📍 Khartoum, Sudan – Tel: +249 91 273 1048
Explore Balsam Medico and discover a world of efficient clinic management at www.balsammedico.com. Together, let’s reduce fines, elevate efficiency, and embrace a new era of dental healthcare.
One last thing..
PS: We built Balsam Medico to be the best software for clinics in UAE and the middle east. It is powerful, flexible, and most importantly, very easy to use.
If you have two minutes, see how it works.
This is the main landing page to learn more.